MeshRepair Documentation
3D Mesh Repair
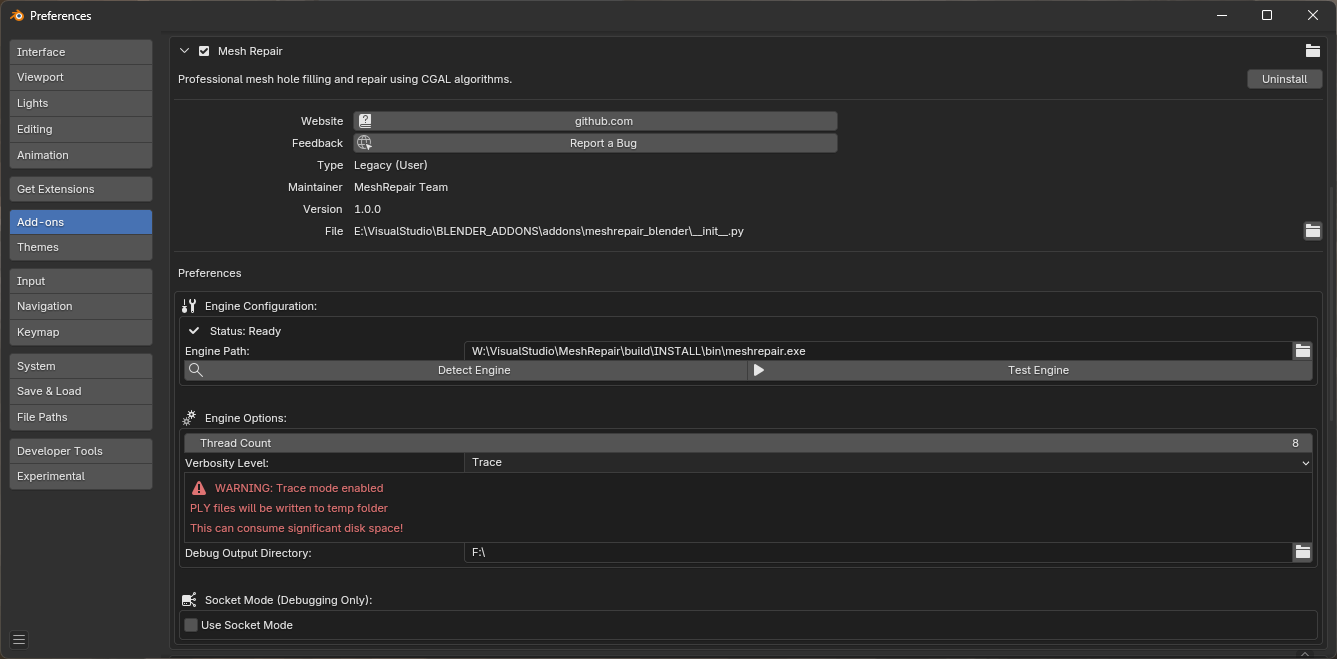
MeshRepair for Blender - User Guide
Blender addon for mesh hole detection and filling
MeshRepair for Blender integrates the MeshRepair engine directly into Blender’s interface, providing access to hole detection and filling operations from the sidebar panel. This guide covers installation, configuration, and usage.
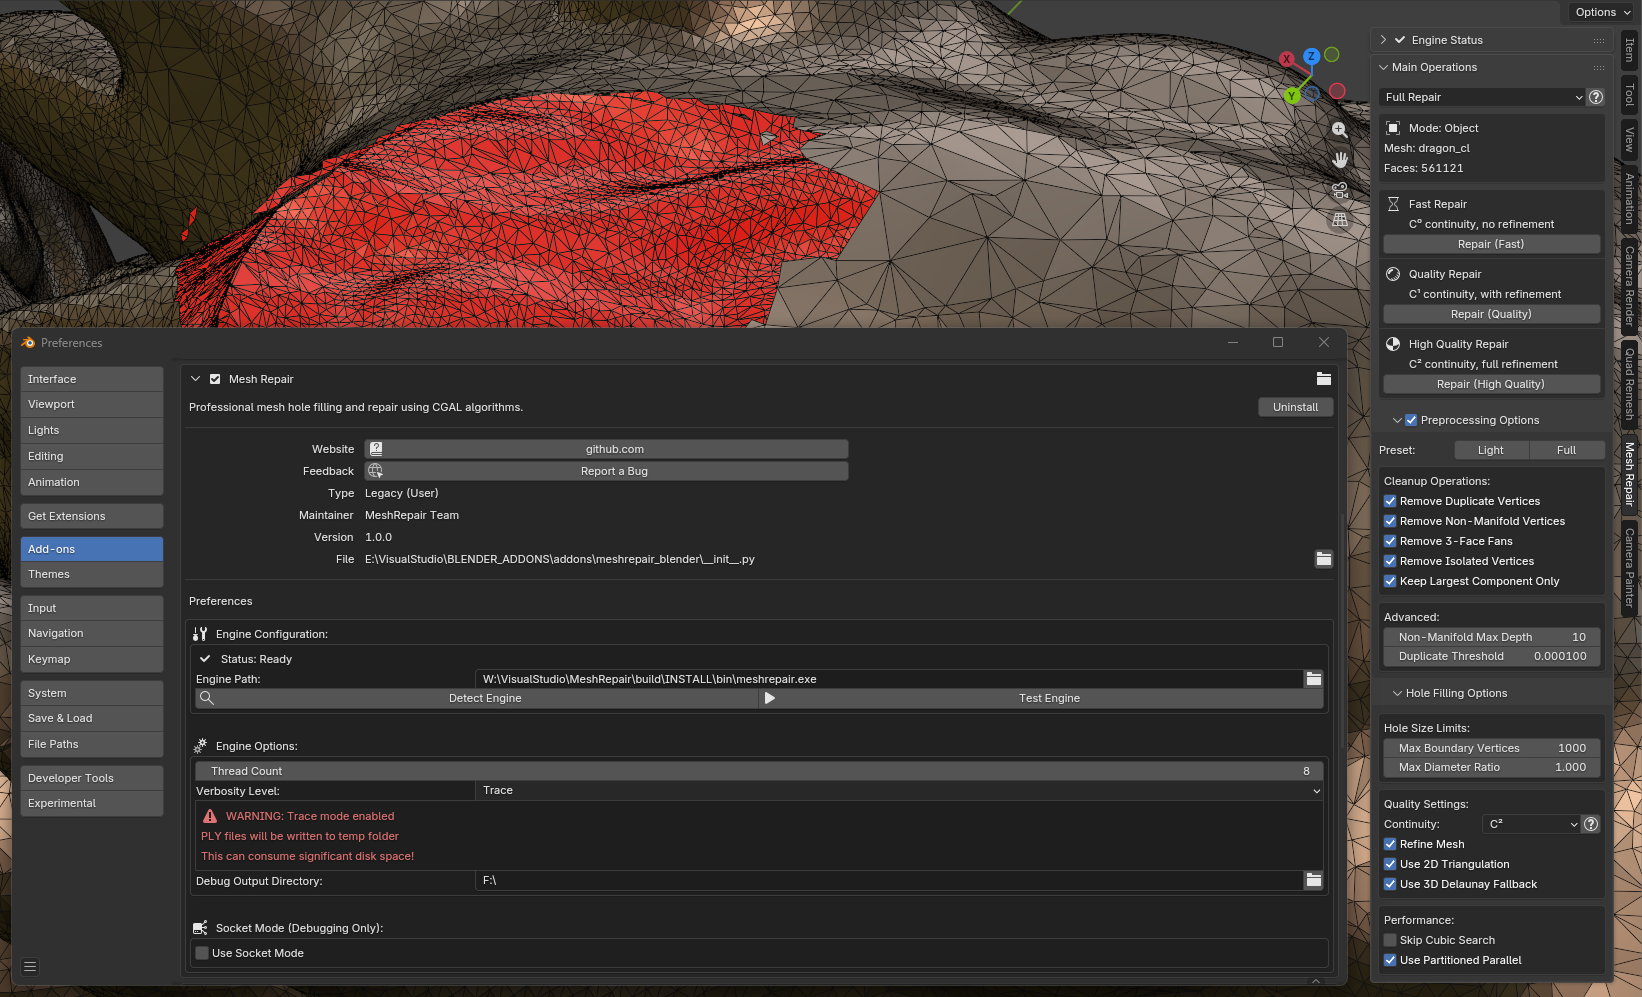
Table of Contents
- Feature Summary
- Installation
- Interface Overview
- Preset Operations
- Manual Operations
- Edit Mode Operations
- Preprocessing Options
- Hole Filling Options
- Results and Statistics
- General Guidelines
- Troubleshooting
Feature Summary
| Feature | Description |
|---|---|
| Preset Modes | C⁰, C¹, C² continuity presets |
| Edit Mode Support | Process selected faces only |
| Preprocessing | Topology cleanup before hole filling, including optional long-edge and thin-bridge cleanup |
| Statistics Display | Operation results and timing |
| Undo Support | Full integration with Blender’s undo system |
| Multi-threaded | Parallel processing via external engine |
Installation
Step 1: Install the Engine
The addon requires the MeshRepair engine executable:
- Download from Patreon or build from source
- Extract to a permanent location:
- Windows:
C:\Program Files\MeshRepair\ - Linux:
/usr/local/bin/or~/meshrepair/ - macOS:
/Applications/MeshRepair/or/usr/local/bin/
- Windows:
Step 2: Install the Addon
- Download
meshrepair_blender.zipfrom releases - In Blender: Edit → Preferences → Add-ons
- Click Install… and select the ZIP file
- Enable “Mesh: MeshRepair”
Step 3: Configure Engine Path
- In addon preferences, click Detect Engine for automatic detection
- If detection fails, manually browse to the
meshrepairexecutable - Click Test Engine to verify connectivity
Verification
The Engine Status panel should display:
- Status: Ready (green indicator)
- Engine version number
Interface Overview
Panel Location
- Select a mesh object
- Press N to open the sidebar
- Select the Mesh Repair tab
Panel Structure
| Section | Function |
|---|---|
| Engine Status | Connection status and version (collapsible) |
| Context Info | Current mode and mesh/selection data |
| Operation Buttons | Preset or manual operation controls |
| Preprocessing Options | Topology cleanup settings (collapsible) |
| Hole Filling Options | Algorithm parameters (collapsible) |
| Results | Statistics from last operation |
Context Display
The panel displays context information based on current mode:
| Mode | Information Displayed |
|---|---|
| Object Mode | Object name, total face count |
| Edit Mode | Selected faces / total faces, scope selector |
| No Selection | Warning message |
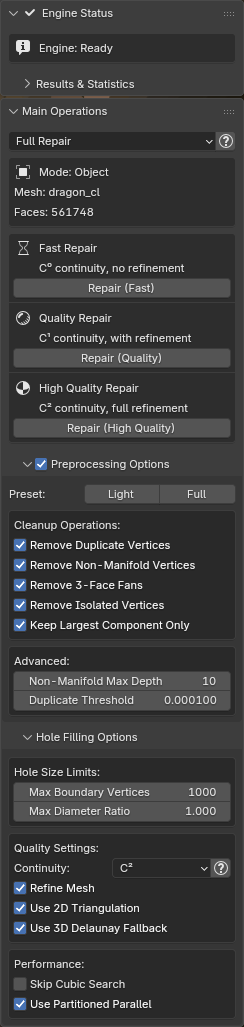
Preset Operations
For standard use cases, preset buttons provide configured parameter combinations:
C⁰ (Fast)
| Parameter | Value |
|---|---|
| Continuity | C⁰ (positional) |
| Refinement | Disabled |
| Cubic Search | Skipped |
Suitable for: Preview, large meshes, non-critical repairs
C¹ (Standard)
| Parameter | Value |
|---|---|
| Continuity | C¹ (tangent) |
| Refinement | Enabled |
| Cubic Search | Normal |
Suitable for: General use, balanced quality and performance
C² (High Quality)
| Parameter | Value |
|---|---|
| Continuity | C² (curvature) |
| Refinement | Enabled |
| Cubic Search | Normal |
Suitable for: Final output, additive manufacturing, high-fidelity requirements
Manual Operations
For fine control, switch to Custom mode:
Operation Sequence
1. Preprocess Mesh
Executes topology cleanup operations.
Operations performed:
- Duplicate vertex merging
- Non-manifold geometry removal
- Optional long-edge polygon removal
- Optional thin-bridge polygon removal
- 3-face fan collapse
- Isolated vertex removal
2. Detect Holes
Analyzes mesh and reports hole count.
Output:
- Total holes detected
- Hole size distribution
3. Fill Holes
Fills detected holes using configured parameters.
Output:
- Holes filled successfully
- Holes failed
- Holes skipped (exceeded size limits)
- Geometry added (vertices, faces)
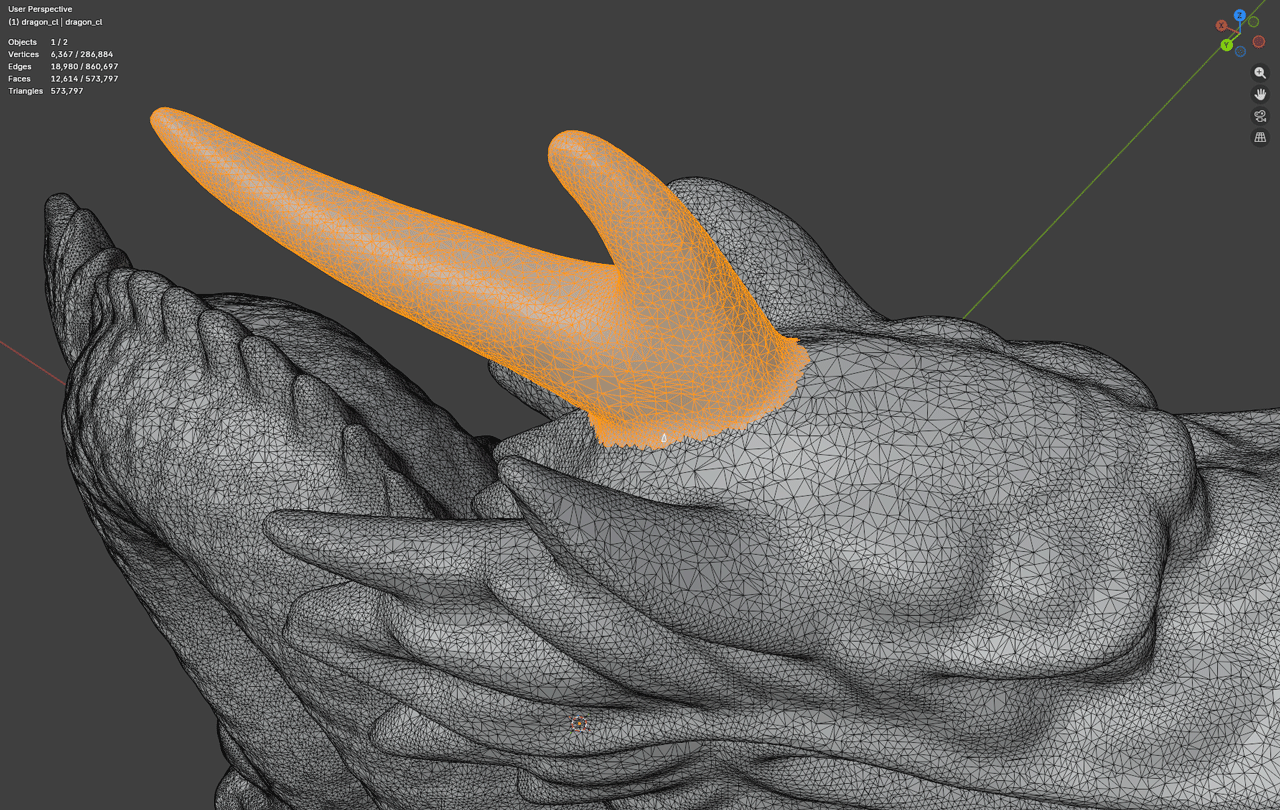
Edit Mode Operations
The addon supports processing selected regions in Edit Mode.
Use Cases
| Scenario | Benefit |
|---|---|
| Selective repair | Process specific areas only |
| Preserve intentional openings | Skip holes that should remain open |
| Large mesh processing | Reduce computation by limiting scope |
| Iterative workflow | Address problems incrementally |
Scope Selection
In Edit Mode, the Scope option controls processing extent:
| Option | Behavior |
|---|---|
| Remesh | Treat selected faces as a hole rim, delete them, and fill the opening |
| Selection | Keep selected faces, fill holes found inside the selection |
| Whole Mesh | Process entire mesh regardless of selection |
Remesh:
Selection:
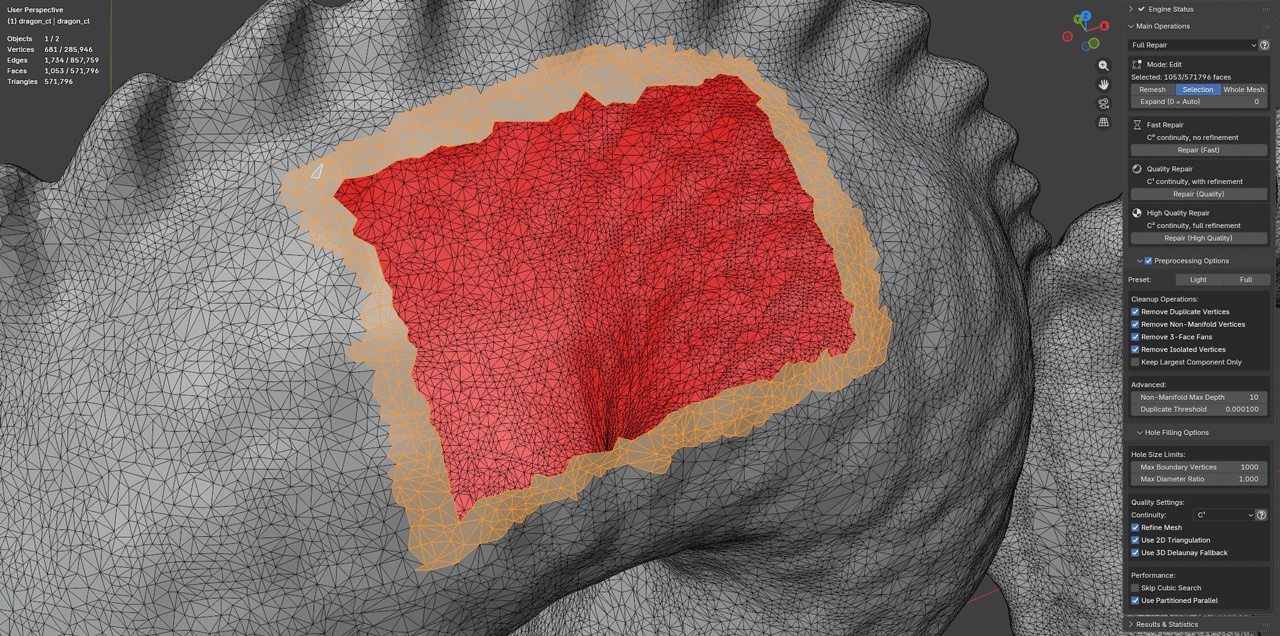
Selection Workflow
- Enter Edit Mode (Tab)
- Switch to Face Select mode (3)
- Select faces surrounding holes to repair
- Include adequate surrounding geometry for blending
- Execute repair operation
Warning:
- Selection mode is quite brittle; ensure proper selection to avoid unintended results.
- Make sure to use polygon selection, not vertex or edge selection.
- Sometimes expanding the selection Ctrl+ couple times and shrinking Ctrl- it back helps to get a clean selection.
- Delete new geometry if results are unsatisfactory and run in Whole Mesh mode or in Object Mode.
Selection Expansion
The addon automatically expands selection to include neighboring geometry for smooth blending. Control this with Expand (0 = Auto):
| Value | Behavior |
|---|---|
| 0 (Auto) | Automatically chooses expansion based on continuity (at least 1 ring, 2 rings for C²) |
| 1-8 | Manual expansion iterations |
Default is auto. Higher values provide smoother blending at increased computation cost.
Selection Boundary Handling
The addon distinguishes between:
- Selection boundaries: Edges of the selected region (not holes)
- Actual holes: Gaps in the mesh surface
Selection boundaries are automatically excluded from hole filling.
Preprocessing Options
The Preprocessing panel is open by default; use it to access cleanup settings:
Presets
| Preset | Description |
|---|---|
| Light | Duplicates and isolated vertices only |
| Full | All cleanup operations enabled |
Individual Operations
| Option | Description | Default |
|---|---|---|
| Remove Duplicates | Merge coincident vertices | Enabled |
| Remove Non-Manifold | Remove invalid topology | Enabled |
| Remove 3-Face Fans | Collapse degenerate configurations | Enabled |
| Remove Isolated | Delete unconnected vertices | Enabled |
| Keep Largest Only | Remove small disconnected components | Disabled |
| Remove Long Edges | Remove polygons containing edges above a length ratio threshold | Disabled |
| Remove Thin Bridges | Remove narrow same-hole boundary-to-boundary polygon bridges | Disabled |
Advanced Parameters
| Parameter | Default | Range | Description |
|---|---|---|---|
| Non-Manifold Depth | 10 | 1-20 | Search recursion limit |
| Duplicate Threshold | 0.0001 | 0.0-1.0 | Distance for coincidence detection |
| Max Edge Ratio | 0.125 | 0.0-10.0 | When Remove Long Edges is enabled, edges longer than this fraction of the object bounding-box diagonal mark their polygons for removal |
| Bridge Face Hops | 2 | 0-16 | When Remove Thin Bridges is enabled, maximum face hops between the boundary edges of a candidate bridge |
| Bridge Boundary Separation | 0 | 0-128 | Boundary-loop separation guard for thin-bridge removal; 0 uses an automatic guard |
Thin-bridge cleanup is designed for scan artifacts where a narrow polygon strip connects two nearby sides of the same open boundary. It skips strips whose two sides belong to different holes, because deleting those strips would merge separate holes into one larger hole.
Hole Filling Options
The Hole Filling panel is open by default; use it to access algorithm parameters:
Size Limits
| Parameter | Default | Description |
|---|---|---|
| Max Boundary | 1000 | Maximum hole boundary vertices |
| Max Diameter | 0.1 | Maximum diameter as ratio of mesh bbox |
Holes exceeding these limits are skipped. The diameter check uses the full object bounding-box diagonal cached before partitioning, so threaded fills and edit-mode scopes use the same reference. For very large openings, increase Max Diameter above 1.0.
Quality Parameters
| Parameter | Options | Description |
|---|---|---|
| Continuity | C⁰, C¹, C² | Surface smoothness level |
| Refine Mesh | On/Off | Match local triangle density |
Continuity Levels
| Level | Description | Computation |
|---|---|---|
| C⁰ | Positional continuity | Low |
| C¹ | Tangent continuity | Medium |
| C² | Curvature continuity | High |
Algorithm Parameters
| Parameter | Default | Description |
|---|---|---|
| Use 2D Triangulation | Enabled | Primary triangulation method |
| Use 3D Delaunay | Enabled | Fallback triangulation |
| Skip Cubic Search | Disabled | Skip exhaustive algorithm |
| Partitioned Parallel | Enabled | Multi-threaded processing |
Default values are suitable for most cases.
Results and Statistics
After operations, the Results & Statistics panel (between Engine Status and Main Operations) displays statistics:
Summary
| Field | Description |
|---|---|
| Operation | Type of operation performed |
| Status | Success or error indication |
| Time | Execution duration |
Preprocessing Statistics
| Statistic | Description |
|---|---|
| Duplicates | Vertices merged |
| Non-manifold | Invalid geometry removed |
| Long-edge Polygons | Polygons removed due to edges exceeding the configured max edge ratio |
| Thin-bridge Polygons | Polygons removed by same-hole thin-bridge cleanup |
| 3-Face Fans | Configurations collapsed |
| Isolated | Unconnected vertices removed |
Hole Filling Statistics
| Statistic | Description |
|---|---|
| Detected | Total holes found |
| Filled | Successfully repaired |
| Failed | Unable to repair |
| Skipped | Exceeded size limits |
| Vertices Added | New vertices created |
| Faces Added | New triangles created |
General Guidelines
| Recommendation | Rationale |
|---|---|
| Save before repair | Undo support exists, but saves provide fallback |
| Start with presets | Adjust parameters only if results are unsatisfactory |
| Use Edit Mode for large meshes | Reduces computation by limiting scope |
| Check statistics | Non-zero failed count indicates potential issues |
Troubleshooting
Engine Not Found
Resolution:
- Open addon preferences
- Click Detect Engine or browse manually
- On Linux/macOS: verify executable permissions (
chmod +x meshrepair)
No Holes Detected
Possible causes:
- Mesh is watertight
- All holes exceed size limits
- Preprocessing required
Resolution:
- Run preprocessing first
- Increase Max Boundary and Max Diameter values
- Inspect mesh in Edit Mode (Select All, check for boundaries)
Filling Failures
Possible causes:
- Degenerate geometry
- Self-intersecting hole boundaries
- Complex non-planar holes
Resolution:
- Disable “Use 2D Triangulation”
- Run full preprocessing
- Repair problematic areas manually in Edit Mode
Performance Issues
Resolution:
- Use C⁰ preset for initial testing
- Process large meshes in sections using Edit Mode
- Reduce Max Boundary to skip large holes
- Verify thread count in addon preferences
Unexpected Results
Resolution:
- Undo (Ctrl+Z) and adjust parameters
- Use Edit Mode for section-by-section repair
- Run preprocessing before filling
- Check for overlapping or self-intersecting geometry
Debug Information
For issue reporting, enable verbose output:
- Open addon preferences
- Set Verbosity to 3 (Debug) or 4 (Trace)
- Open system console:
- Windows: Window → Toggle System Console
- Linux/macOS: Launch Blender from terminal
- Execute operation and capture console output
Addon Preferences Reference
Access via Edit → Preferences → Add-ons → Mesh: MeshRepair
Engine Settings
| Setting | Description |
|---|---|
| Engine Path | Path to meshrepair executable |
| Detect Engine | Automatic path detection |
| Test Engine | Verify engine connectivity |
Performance
| Setting | Default | Description |
|---|---|---|
| Thread Count | 8 | Worker threads (0 = automatic) |
Debugging
| Setting | Default | Description |
|---|---|---|
| Verbosity | 1 (Info) | Output detail level (0-4) |
| Temp Directory | Empty | Debug file output location |
| Socket Mode | Disabled | TCP connection (for debugging) |
Related Documentation
References
Hole filling algorithm:
Peter Liepa. “Filling Holes in Meshes.” Eurographics Symposium on Geometry Processing, 2003.
Fairing algorithm:
Mario Botsch et al. “On Linear Variational Surface Deformation Methods.” IEEE Transactions on Visualization and Computer Graphics, 2008.